
Homemade bread that you can bake in the oven even without experience, surprisingly easy to make
The aroma of freshly baked bread has a unique ability to slow down the day. Suddenly, even an ordinary afternoon feels like a small celebration: a board on the table, a bowl of salt beside it, and somewhere in the background, the quiet cracking of the crust as it cools. Homemade bread is not the privilege of rural kitchens or those with a "baking talent." All it takes are a few basic ingredients, a bit of patience, and good timing. And a willingness to try it without unnecessary stress—because how to bake homemade bread in the oven can be surprisingly quick to learn, even if one has never made leavened dough before.
Home baking also has another pleasant aspect: you know exactly what you're eating. Bread often hides "details" that aren't needed in a homemade version—improvers, unnecessary sugars, preservatives. When baking at home, all you need is flour, water, salt, and either sourdough or yeast. Suddenly, it's all simpler than it seems. It's also a small step towards a more sustainable household: fewer packages, less waste, and the opportunity to use leftovers. Anyone who has ever saved a stale slice as croutons for soup or breadcrumbs knows that a tasty and simple recipe for homemade bread is also a recipe for a more practical kitchen.
Why Homemade Bread is Worth It (and It's Not Just About the Aroma)
The habit of buying bread on the way home from work is understandable. But store-bought bread can be inconsistent: sometimes it's great, other times it's dry the next day, or too "fluffy" and tasteless. Homemade bread can be tailored exactly to your liking—denser or lighter, with a crunchy crust or softer, with caraway seeds, seeds, wholemeal flour. And importantly: it can be baked to be consistently good.
It's not just about taste. Home baking often leads to less waste because you can bake a loaf as big as you actually consume. When you run out of flour, you can substitute part of it with another—and gradually learn to improvise. From a healthier lifestyle perspective, it's nice to control the amount of salt, add fiber, seeds, or even part of rye flour. And for many, it's a return to what used to be common: simple food that satiates without needing complex preparation.
It's worth noting that homemade bread isn't automatically "healthier" just because it's homemade. It depends on the ingredients and quantities. But the choice is much greater here than with a regular roll from the shelf. For inspiration and basic principles of nutrition and food composition, it's useful to look at sites like the National Institute of Public Health (NIPH): https://szu.cz/ or recommendations on cereals and fiber on the WHO website: https://www.who.int/ (general nutritional information). It's not about counting every grain, but rather having a simple tool to make ordinary food a bit better.
And then there's another aspect that doesn't fit into tables: rhythm. Rising teaches patience. You can't persuade the dough to be ready half an hour earlier, and that's actually liberating. As one old bakery rule says: "Dough has its time."
How to Bake Homemade Bread in the Oven: A Logical Approach That Works Even for Beginners
When people ask how to bake homemade bread in the oven, they often expect some secret trick. In reality, it's about a few principles that, when followed, result in bread that turns out repeatedly well. The three most important things are: good dough (well-hydrated but not liquid), sufficient rising (neither rushed nor overdone), and a properly preheated oven (ideally with steam or a closed space).
An oven at home is a big advantage because it can maintain a stable temperature. A crispy crust mainly forms because the surface of the dough "seals" at the start of baking and then browns slowly. That's why it's often recommended to bake the first part with steam—or use a cast-iron pot with a lid to create its own microclimate. If a cast-iron pot isn't available, you can improvise: an old tray with hot water at the bottom of the oven, a spray bottle with water, or baking on a stone. None of this is mandatory, but it helps.
Flour is also important. For starters, wheat bread flour (higher gluten content helps the structure) is the safest bet. Those who want a more flavorful loaf can add rye—perhaps 20–30% of the total amount. Rye flour absorbs more water, and the dough becomes stickier, which might surprise beginners. It doesn't mean anything is wrong. It just requires working with the dough more with a spatula and wet hands rather than adding heaps of flour.
And what about yeast versus sourdough? Sourdough has charisma and a deeper flavor, but also takes more time and a bit of care. Yeast is a more straightforward path when it comes to a tasty and simple recipe for homemade bread without much preparation. It's not a competition; both have their place. Below is a recipe based on yeast, but with longer rising for better flavor and structure—a compromise that tends to be most appreciated in home kitchens.
A Tasty and Simple Recipe for Homemade Bread (That Can Be Baked Again and Again)
This recipe is designed to be reliable, with minimal ingredients and without complicated equipment. It's suitable for anyone who really wants to understand how to bake homemade bread in the oven, and not just "try something" once. The loaf will be approximately 800–900 g, depending on the flour and water used.
Basic Ingredients and Tools
To follow the recipe well and easily repeat it, it's worth weighing. Measuring cups work, but a scale is more precise, and it shows in the bread.
- 500 g wheat bread flour (can be partially replaced with rye, e.g., 350 g wheat + 150 g rye)
- 350 g water (lukewarm, not hot)
- 10 g salt (about 2 level teaspoons)
- 3–5 g dry yeast (or 10–15 g fresh)
- 1 teaspoon caraway seeds (optional)
Tools: bowl, spoon or spatula, tea towel, baking paper, baking sheet, or stone. If a cast-iron pot with a lid is available, it's a nice plus, not a necessity.
A Step-by-Step Process That Makes Sense Even on the First Bake
First, mix the flour with salt (and caraway seeds, if using) in a bowl. Yeast can be added directly to the flour if dry; if fresh, it's nice to dissolve it in lukewarm water. Then add water and start mixing—first with a spoon, later with your hand. The dough will be sticky, which is fine. Higher hydration is one of the ways to achieve a moist crumb.
Once the ingredients are combined, a short kneading is enough—5 to 8 minutes. There's no need to wrestle with the dough for half an hour. The goal is to create basic elasticity. If the dough sticks, wetting your hands helps, rather than adding lots of flour (which would unnecessarily dry out the bread).
Then comes the first rising: cover the bowl and leave it in a warmer place for about 60–90 minutes, until the dough visibly increases in volume. In a cooler kitchen, it might take longer. For a more pronounced flavor and if you have time, you can place the dough in the fridge after 30 minutes and let it rise slowly overnight (8–12 hours). In the morning, just shape the loaf and let it rise further. This simple trick often turns a "good" bread into a really great one.
After the first rising, turn the dough out onto a lightly floured surface, fold it over a few times (like a letter), and shape it into a loaf or oval. Then transfer it to baking paper and let it rise for another 45–60 minutes. The loaf should be fluffier and springy to the touch—when gently pressed with a finger, the indentation should slowly return.
Meanwhile, preheat the oven to 230–240 °C. This is a step often underestimated: the oven must be really hot, ideally at least 20–30 minutes in advance, especially if baking on a stone or in a pot. Even if baking on a tray, it's worth preheating thoroughly.
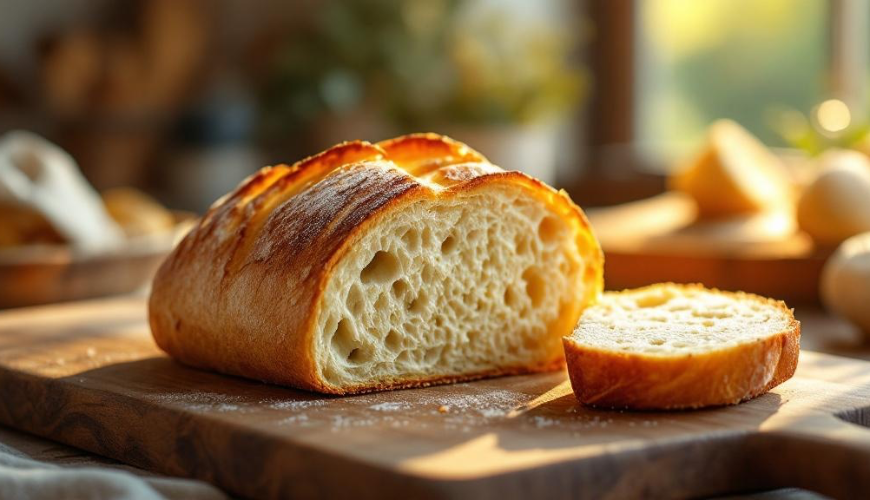
Before placing in the oven, score the top of the loaf with a sharp knife or razor blade—a single long cut or a cross is enough. The cut isn't just decoration: it helps the bread "burst" in a controlled way and rise better.
Baking can be done in two simple ways:
Tray with Steam Option: Place the loaf in the oven and simultaneously add a small tray or bowl of hot water to the bottom (carefully). Bake for 15 minutes at 230–240 °C, then reduce the temperature to 200–210 °C and bake for another 20–30 minutes, depending on the oven. Towards the end, you can remove the water to let the crust crisp up better.
Cast-Iron Pot Option: Preheat the pot in the oven. Place the loaf with the paper inside, cover, and bake for 25 minutes covered at 230 °C. Then remove the lid and bake for 15–20 minutes at 210–220 °C until dark golden.
How to know it's done? The bread sounds hollow when tapped on the bottom. Even more certain is the internal temperature—ideally around 96–98 °C, but a thermometer isn't necessary. After baking, it's important to let the bread cool on a rack for at least 45 minutes. Cutting it immediately is tempting, but the crumb is still "cooking" and could remain sticky.
A Small Kitchen Reality: What Happens When Bread is Cut Too Soon
In a typical household, it often looks the same: the bread is taken out of the oven, the aroma fills the kitchen, and someone is already reaching for a knife. When the loaf is cut after ten minutes, it looks a bit moist and dense inside, and one might feel something went wrong. But it's not a recipe error—just a matter of time. When the same loaf is allowed to cool, the crumb stabilizes, slicing becomes easy, and the flavor is more pronounced. This is often one of the biggest "aha moments" in baking: some things can't be rushed, yet they ultimately save nerves.
Common Little Things That Decide the Outcome
Home baking is forgiving, but a few details can make a big difference. If the loaf spreads out, the dough is often over-risen or too wet and doesn't hold its shape—shortening the second rising or reducing water next time helps. If the bread is dense inside, it might be due to short rising, a cold kitchen, or the dough not being sufficiently kneaded and lacking structure. And if the crust is hard as a rock, it often baked too long or without steam; shortening the bake and adding moisture at the start helps.
The nice thing is that once you learn the basic dough, it can be easily varied without complex rules. Seeds (sunflower, pumpkin, flax) are better soaked briefly, so they don't take water from the dough. Wholemeal flour should be added gradually, as the dough becomes heavier and needs more water and time. And for a really strong flavor, try longer rising in the fridge—without having to maintain a sourdough starter.
When homemade bread becomes routine, another thing happens: new small rituals appear in the kitchen. A slice with butter and a pinch of salt suddenly tastes different because it contains a piece of home labor. And in a time when many things happen quickly and automatically, it's nice to have something that develops slowly—and yet isn't inaccessible or complicated. It's just a matter of reminding yourself now and then that a tasty and simple recipe for homemade bread isn't an achievement, but an ordinary skill that returns with each loaf.

