

# How to Make Homemade Yogurt Without a Yogurt Maker Making homemade yogurt is easier than you migh
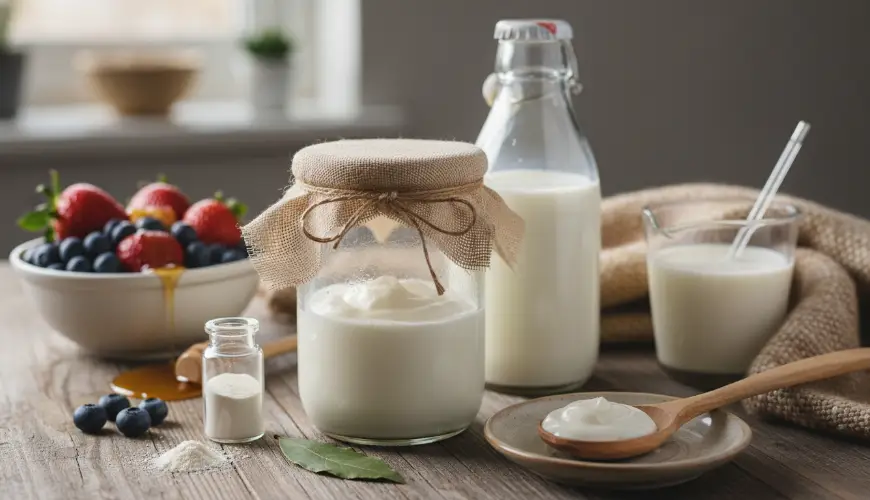
Yogurt is one of those foods that most people automatically buy at the store, never thinking they could make it at home – and without any special equipment at that. Yet making homemade yogurt without a yogurt maker is surprisingly simple, cost-effective, and the result tastes completely different from the plastic cup version on the supermarket shelf. All it takes is a little patience, the right temperature, and a quality starter culture.
Interest in homemade fermented foods has grown significantly in recent years. People are becoming increasingly aware of what they eat, where their food comes from, and exactly what it contains. Yogurt is a perfect example of this – while the homemade version contains only milk and live bacterial cultures, industrially produced yogurts frequently contain stabilizers, thickeners, added sugars, or artificial flavourings. The difference in ingredients is just the tip of the iceberg.
Try our natural products





What actually happens when making yogurt
To properly prepare yogurt, it helps to understand the basic principle of fermentation. Yogurt is created by lactic acid bacteria – most commonly Lactobacillus bulgaricus and Streptococcus thermophilus – which, in a warm environment, convert lactose (milk sugar) into lactic acid. This is what causes the characteristic sour taste and also causes the milk proteins to coagulate, giving yogurt its thick consistency.
This process works best at temperatures between 40 and 45 °C. Higher temperatures will kill the bacteria, while lower temperatures will slow down or completely stop fermentation. Maintaining the correct temperature is therefore the key step – and this is precisely where many people mistakenly assume it simply cannot be done without a yogurt maker. In reality, there are several reliable ways to maintain the right temperature without a specialised appliance.
As a starter culture, you can use either commercially available freeze-dried cultures, or – and this is an elegant solution – simply a spoonful of quality organic yogurt from the shop that contains live cultures. It is important that the yogurt contains no additives and that "live cultures" or "active cultures" is clearly stated on the packaging. Once you have successfully made your yogurt, you can use part of it as a starter for the next batch – and continue doing so indefinitely.
How to make homemade yogurt step by step
The basic procedure is straightforward and truly anyone can manage it. For one litre of whole milk (the better the quality of milk, the better the result – fresh or farm milk is ideal), you will need two to three tablespoons of plain yogurt with live cultures as a starter.
First, heat the milk to approximately 85 °C – this destroys unwanted bacteria and also partially denatures the proteins, which contributes to a better consistency in the finished yogurt. Then allow the milk to cool to 43–45 °C. The temperature can easily be checked with a kitchen thermometer, but experienced home yogurt makers say that if you dip your finger into the milk and can comfortably keep it there for ten seconds, the temperature is approximately right.
Mix the starter yogurt into the warm milk – ideally by first combining the starter with a small amount of milk and then pouring it into the rest. This ensures even distribution of the cultures. Pour the mixture into clean glass jars or a single larger pot and cover.
Now comes the crucial part: maintaining the temperature for 6 to 12 hours. The longer the fermentation continues, the more sour and thick the yogurt will be. Six hours will produce a mild, slightly tangy yogurt; twelve hours will yield a more distinctly sour and firmer result. There are several tried-and-tested ways to maintain the temperature without a yogurt maker:
- Oven with the light on – the bulb alone in the oven creates heat of around 40 °C, which is the ideal temperature.
- Preheated and switched-off oven – preheat the oven to 50 °C, turn it off, place the yogurt containers inside, and keep the door closed.
- Thermos flask or food flask – for smaller quantities, a thermos flask is a surprisingly effective solution.
- Covering with blankets or towels – wrap the pot in several layers of fabric and place it somewhere warm, such as next to a radiator.
- Instant pot or slow cooker – many modern kitchen appliances have a "keep warm" function that maintains exactly the required temperature.
Once the fermentation time has elapsed, move the yogurt to the refrigerator, where it will thicken further and the flavour will stabilise. After a few hours of chilling, the yogurt is ready to eat.
If you want Greek yogurt, simply strain the finished yogurt through a muslin cloth or a fine gauze bag suspended over a bowl. After a few hours, the whey will drain away, leaving you with a creamy, thick mass with a high protein content. Do not throw away the whey – it is full of nutrients and works well in smoothies, soups, or in baking as a substitute for buttermilk.
Why making yogurt at home is truly worthwhile
The economic argument is convincing in itself. A litre of quality organic yogurt in the shops typically costs 60 to 80 Czech crowns. A litre of homemade yogurt made from farm milk comes to approximately 25 to 35 crowns – including energy costs. For a family that regularly consumes yogurt, the annual savings run into the hundreds or even thousands of crowns.
But money is only one side of the coin. Perhaps even more important is what homemade yogurt does not contain. No modified starches, no thickeners, no added sugar, no preservatives. The ingredient list is radically simple: milk and live bacterial cultures. For people with sensitive digestion, for children, or for those monitoring their sugar intake, this is a significant difference.
In terms of health benefits, the probiotic cultures in yogurt are the subject of extensive research. According to the World Health Organization and numerous independent studies, live bacterial cultures contribute to the balance of the gut microbiome, which plays a key role not only in digestion but also in the body's immune response. Homemade yogurt has the added advantage that the bacteria in it genuinely survive in maximum numbers – industrial processing and lengthy distribution reduce the viability of cultures.
It is worth noting that fermented dairy products have been part of the human diet for thousands of years. As food historian Paul Freedman observes: "For most of human history, fermentation was not a fashionable trend but a necessity – and it turned out to be one of the most beneficial food technologies humanity ever developed." Today we are returning to it consciously, with an understanding of why it benefits us.
The ecological dimension of homemade yogurt production is another argument worth mentioning. Every year, tens of millions of plastic yogurt cups are consumed in the Czech Republic, a large proportion of which end up in landfill or incineration. By making yogurt at home in glass jars, you eliminate this waste entirely. If you also use milk from a local farmer or from a dairy with returnable bottles, the environmental footprint of your snack drops to a minimum.
An interesting source of inspiration is the story of Markéta from Brno, a mother of three, who started making homemade yogurt during the pandemic out of sheer necessity – the shops were crowded and she was looking for ways to reduce her shopping trips. Today, several years later, she no longer buys yogurt in the shop. "It stopped making sense to me," she says. "At home I know exactly what's in it, the children love it, and it costs me a third of the price." Her story is not unusual – thousands of households across Europe have followed a similar path.
For those who want to go even further, homemade yogurt is an excellent starting point for the whole world of fermentation. The same principle underpins the preparation of kefir, cottage cheese, labneh, and crème fraîche. Mastering one fermented product opens the door to others and gradually changes the way one thinks about food – from passive consumer to active creator of one's own kitchen.
The only real obstacle is the first step – overcoming the feeling that this is something complicated or time-consuming. In reality, the active preparation time does not exceed twenty minutes. The rest is left to time and warmth. And the result? Creamy, living, real yogurt that tastes the way yogurt is supposed to taste.